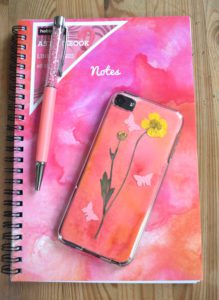
There are a lot of different smartphones on the market, and, of course, also a lot of smartphone cases in all shapes and sizes. But there is no need to spend your money on some elaborate case, when you can just go with a clear one, some colored paper, and scissors.
First, choose the paper and style you want to use for your case. For an especially artsy effect, use colored or patterned paper, for example one with a marble effect.
Next place your clear case face down on to a white sheet of normal writing paper and trace the shape using a pencil. Cut out your template and place it inside the phone-case. Mark where the case begins to slope upwards, and where the camera hole should be. Remove the paper and adjust the shape of the template along the lines you made. For cutting out the camera hole a crafting-knife can be a lot handier than scissors.
As soon as you’re happy with the shape of your template, use it as a guide to cut out your colored paper.
Place the paper inside the case, re-insert your phone, and enjoy your DIY case!
Tips and Ideas:
- For a watercolor-case, use colored card and paint random spots of color with watercolor-pens or a brush, using very little water. Once you’ve applied the colors, brush over the design with clear water to make the colors blend.
- If you sprinkle the wet watercolors with salt, it will suck up the water and leave you with lighter areas (normal watercolors) or darker areas (watercolor pens).
- Add pressed or dried flowers to your case.